 |
| Pure Spec 2011 |
For Pure Speculation Edmonton (also known as PureSpec) we decided to try our hand at Steampunk. We spent endless hours extending the lengths of our creativity making three individually unique and personally reflective costumes. Since then, we've been able to wear these at several different events and even broadened our Steampunk assortment to include interchangable accessories. I'm going to split them out into three posts as we took lots and lots of pictures of our processes (yet only have one clear shot of each of us?!?!) I'm also going to focus on the original version of our outfits so that I try and stay on track.
 |
| Indira AKA Mrs Spiderman @Calgary Expo 2012 |
This post will probably be updated with better shots as time goes on, but the best place to look is our Flickr account....
What I really wanted to do here was create a cosplay outfit that works with my heritage... Translation? I wanted to take a Sari and stick a crap ton of gears all over it. We started with coming up with backstories for our characters. Since Steampunk lit is mostly based in Europe and some of the Americas, we decided that Indira was an International Assassin. We made a bunch of weapons hoping that some of them would work with the esthetic.
 |
| Flash? What's a flash? |
The outfit itself is Sari fabric we picked up at our local shop. We also picked up a complimenting golden orange taffeta fabric to fill out the skirt. Even though it's Sari material, it ended up looking more like a Lengha-styled outfit. Or at least what I think a Lengha would probably look like in the Steamunk timeline. When shopping for Saris, they will usually come with a length of material you can turn into a blouse. This will also have matching border pieces you can use to tie the outfit together. Mine unfortunately didn't have enough border to do all the areas I wanted so I settled on the neckline only.
Over the course of this endeavour, we checked out a lot of con floors selling Steampunk clothes and accessories. Once you check out two or three you will start to see some similar basic stock. You've got to keep an eye our for people that either sell the basic wares, like goggles for $10-$14 that you can then individualize, or people that have already done so but be willing to spend the $$. This is a LOT of detailed work and they do deserve to be compensated for it. We've found quite a few sellers online, but over time many have switched from offering goods direct to the consumer to retailers only (sad panda)... If you find a clearance sale, and you want to build up your steampunk wardrobe, purchase a few right then and there! You will be much happier.

Back on track, while searching through our local thrift stores we came across this really worn our red leather jacket. The colouring was perfect to compliment Indira's outfit. We turned this into a harness and gauntlets. The gauntlets have then the small amount of the excess blouse material added to tie the whole outfit together. One another note, I'd like to point out that gears are really sharp and whenever I forget to wear the gauntlets, I ultimatley get scratched to bits by all the gears all over my outfit.

Here comes the detail work... I purchased some watch parts from a few different Etsy sellers who were selling supplies. I then sorted out all the same size gears and glued one on every.single.flower. I am really proud of this work and if you compliment me while I'm wearing my Indira outfit, that is ALWAYS the first thing to come out of my mouth! This is where the gauntlets protect me the most. From my own skirt. I then hand stitched some chain around the skirt to give it some more dimension. There are two rounds of chain on the skirt itself. Its not something that photographs well, but reads really well in person.

Finally the goggles... I found a pair of ski goggles (what do you expect? It's Calgary). I spray painted the exterior gold. I cut off the band and attached some of the leftover leather from the harness (matchy matchy!)... Then on the goggles piece itself, I used some complimenting lace I cut off from one of my old shirts. I used some Modge Podge and adhered it. The extra "ocular" piece is actually a cut up cap from a creamer container. I then inserted a light inside for some extra dimension. Around the goggles itself I glued some accents: gears, hat pins and the
like. I really loved working on these pieces.Randomly gluing things all over the place was really fun. I wouldn't be surprised if I did this to more things in my home... It's addictive...
I've played around with my makeup each time, but the one things I really like to do is replace the traditional Bindi with a gear. I know that irritates some people but I enjoy it. And at the end of the day, I'm the one wearing it!
I keep searching for more international-inspired Steampunk ideas, so if there are any out there that I've missed I'd love to hear about them!
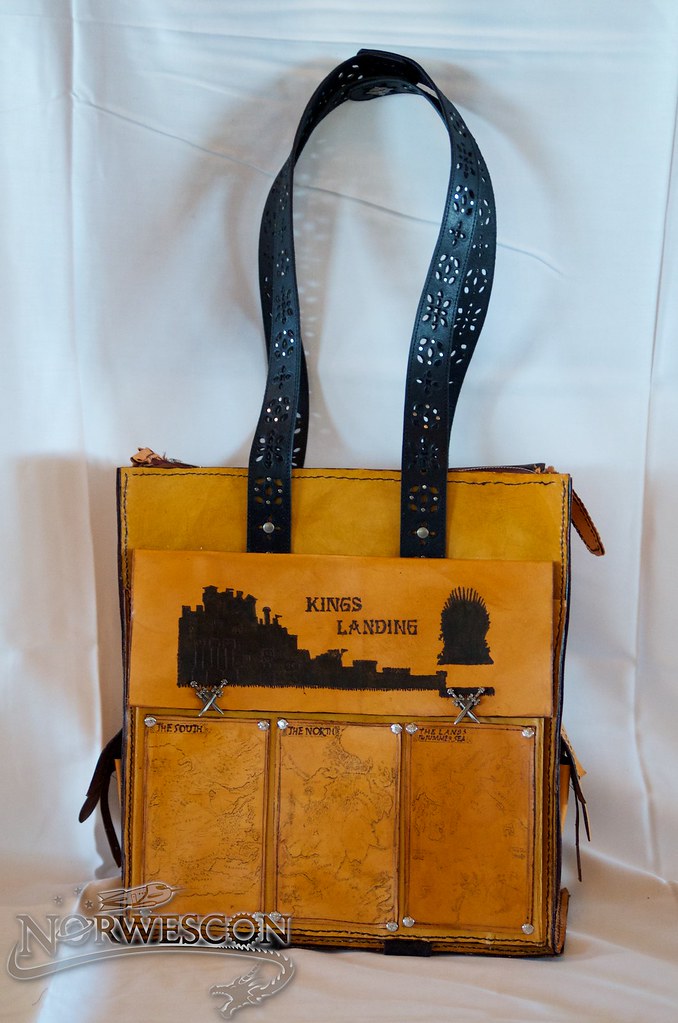 On the opposite side the maps were transferred by citrasolve but had to be burned in as the citrasolve transfer was too light. The Kings Landing and Iron Throne were free hand burned in.


