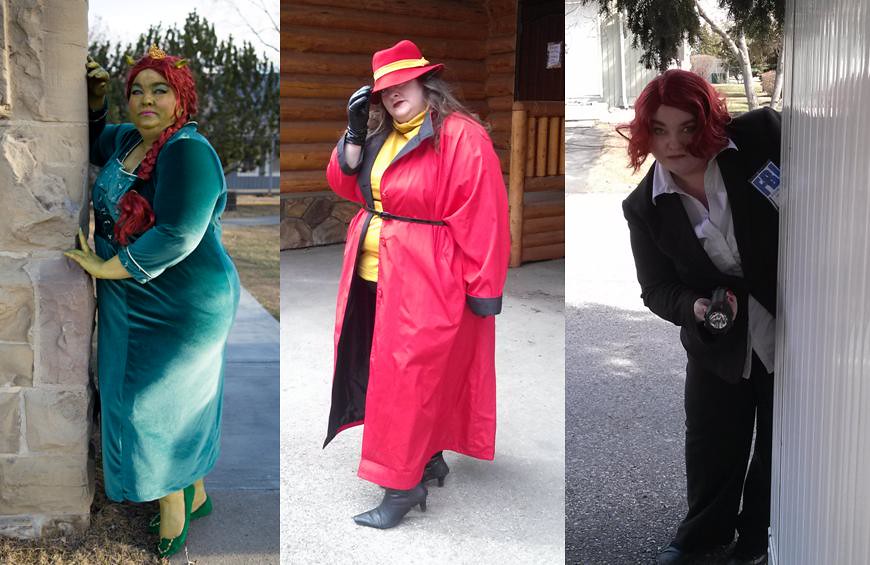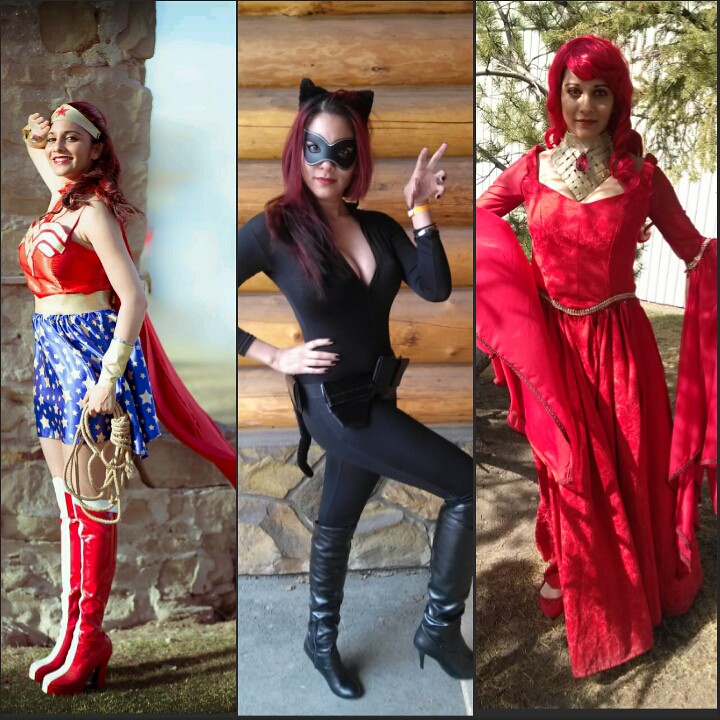
Showing posts with label Hall Costumes. Show all posts

Tuesday, April 30, 2013

Iron Cosplaying at Calgary Expo 2013

After a pretty rough start, I'd have to say that I had an amazing time at Calgary Expo 2013! Got to show off some pretty amazing costumes, got to see some pretty spectacular costumes, and got to see the likes of the Lannisters; Peter Dinklage and Lena Headey, and the great and wonderful Nathan Fillion! 
My Weekend looks at Calgary Expo: Friday, Saturday, Sunday
Friday was a little confusing... For the first time since the 2013 guest announcements I forgot to check the Twitter feed and got completely turned around... Needless to say, I missed the Princess Bride: The Hero, the Villain Panel. The room was full! Apparently I wasn't the only one. I ended up watching it on the Calgary Expo FlipOn channel and learned something heartbreaking... My dearest Westley chews with his mouth open!!! Seriously, other than that, that panel broadcast gave me all the feels. I really wish I could have been there...
Chris Sarandon and Cary Elwes
Friday we also took the opportunity to head on down to the Unicorn, where if you showed up in costume, you would get 25% off you bill... With all the other events going on that night, we were the ONLY ONES in costume... You would *think* that would be awkward, but a lovely couple bought me and Dejathoris a drink so it all was worth it! 
Dejathoris' Friday, Saturday and Sunday
Saturday morning we headed out early. Or at least in my mind what's early for a Saturday. There was an Special Effects panel in the Roatary House that we both wanted to go to.... In all the years I've been going to the Stampede grounds, I have NEVER.NOTICED the Rotary House... That's not weird right? Either way, I was a little disappointed in the panel itself. I think the presenter was more focused on SPFX jobs rather than teaching techniques. Or I misunderstood what the panel was about. The panel was 3/4 of the way through before they even started doing makeup on people, and they weren't really explaining what they were doing. However, got some great recommendations on some books to pick up. 
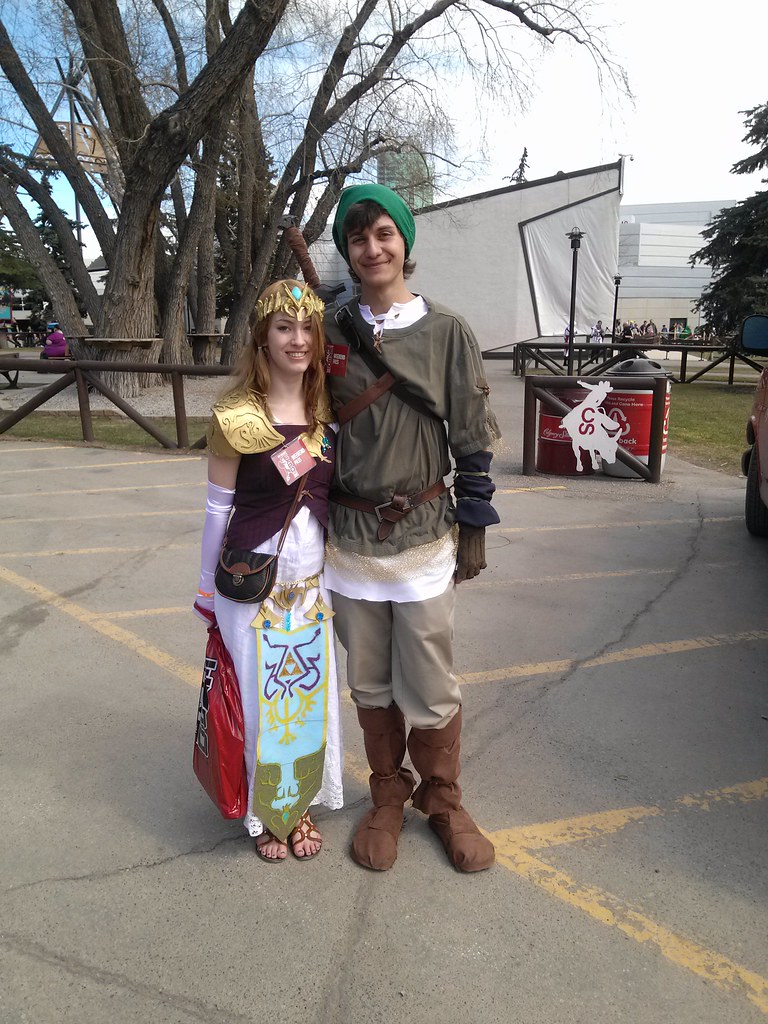
The day then transitioned into watching the folks battling out where the Coke Stage is in full armor and having lunch. This was one of my favorite add ons. Outdoor entertainment! People/Cosplay watching! Food Trucks! Just delightful! Whilst said people watching, I took a snapshot of what I think was the BEST Link & Zelda all weekend (and there were a LOT people!)

We then headed back to the Roatary House to watch the Iron Costumer competition. We've heard about these before but have been unable to attend. HOWEVER, one team didn't show up, so Dejathoris and I teamed up with this delightful couple in line behind us and put together a team! 
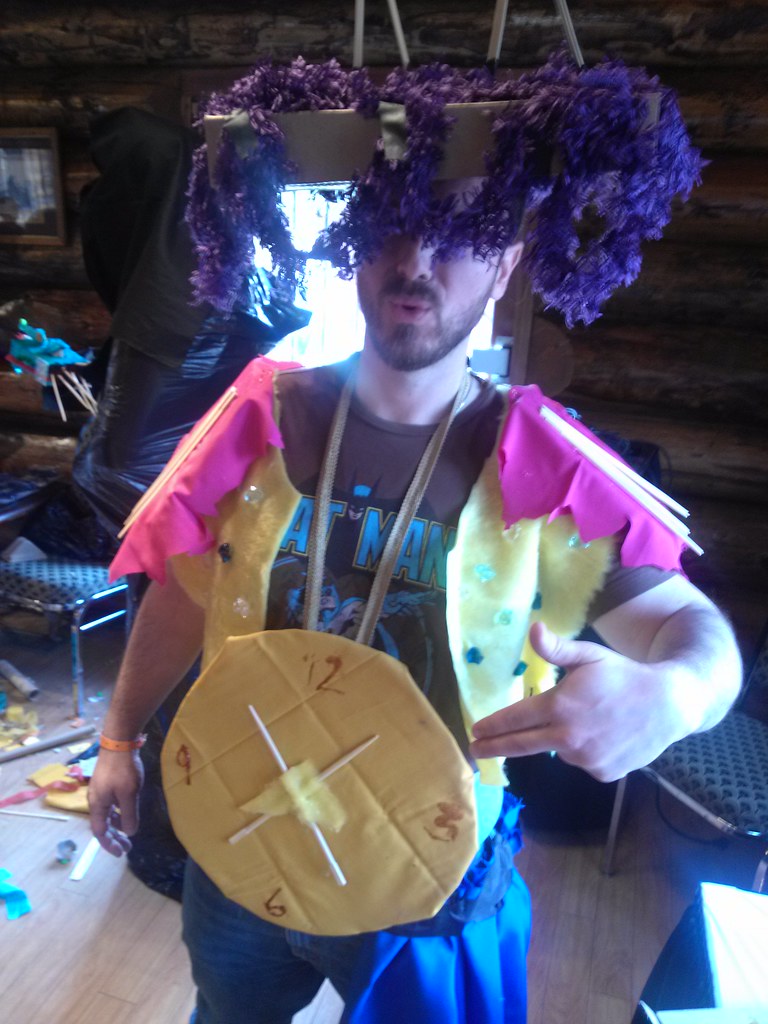
That's a chopstick horn helmet, by the way


The Theme: Time Travel
The "Special Ingredient: Chopsticks
Our Team Name: Tag You're it!
Our Costume: Flava Flav from 1992
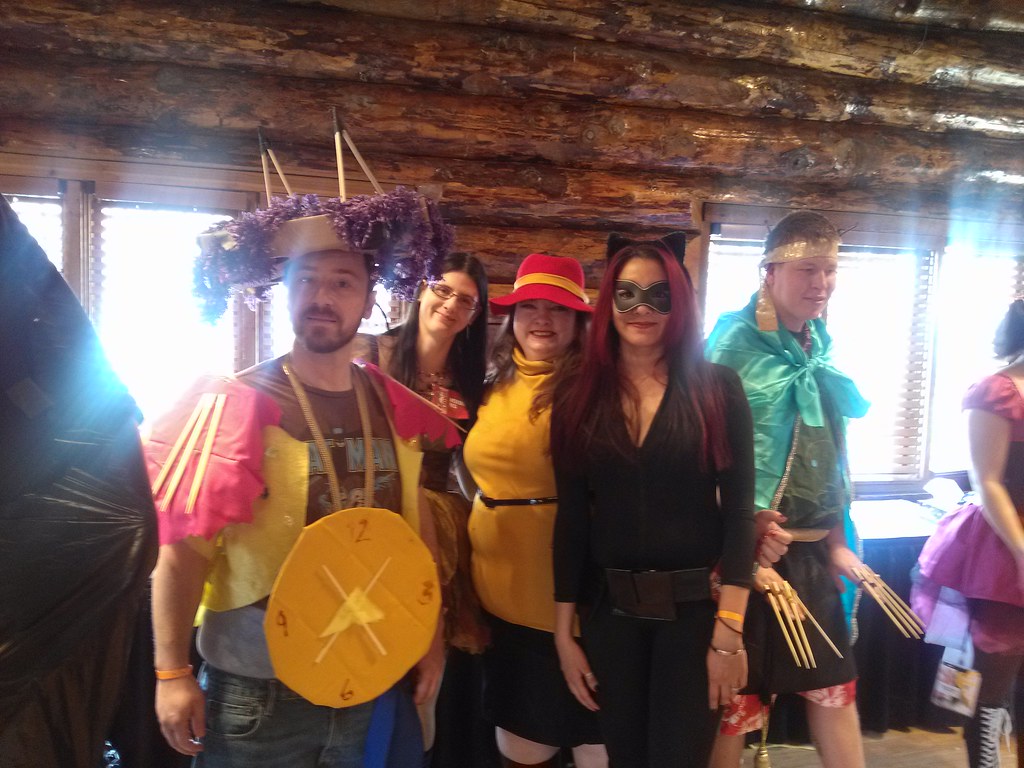
Iron Costumer winners 2013


What do you think? We were up against a time travelling alien and a black hole with the Planet Express. Both were also awesome and some how WE WON! 
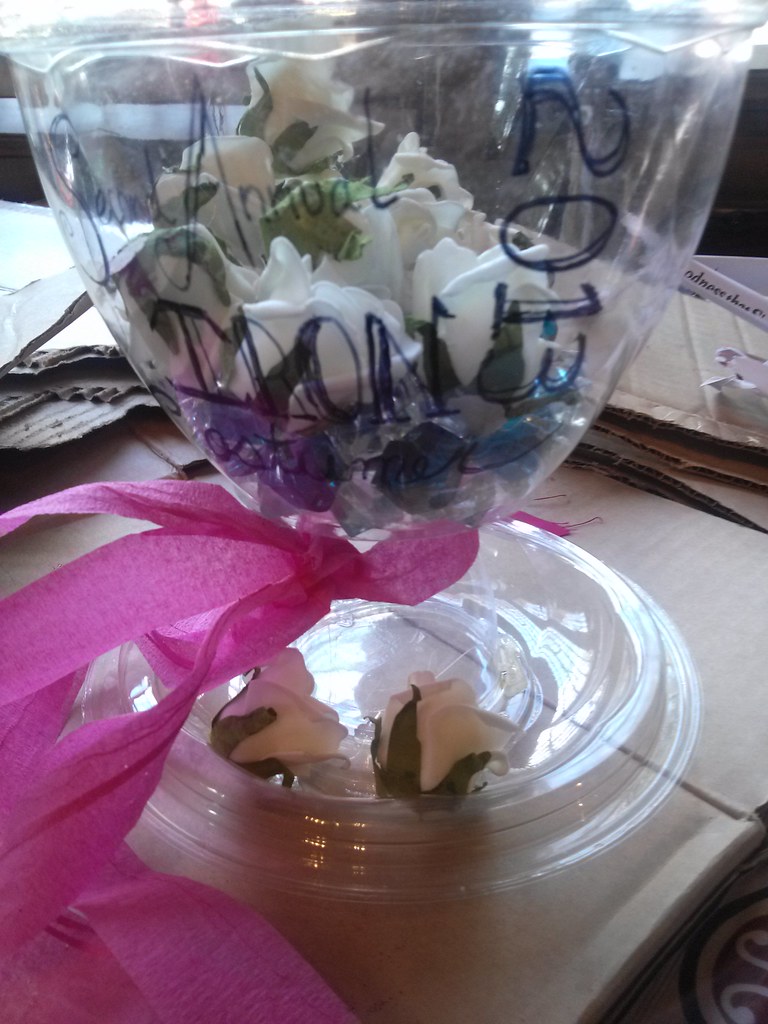
Our Iron Costumer Prize!


Saturday finished up at the Con by watching the Stargate Panel, in which I've learned that Michael Shanks' ALSO CHEWS WITH HIS MOUTH OPEN and that Richard Dean Anderson really doesn't give a shit. That second part, totally, totally awesome.

Screenshot from the Stargate Panel


Eliza Dushku really knows how to handle a con crowd. She was delightful while still promoting her projects and her social media outlets.  I really loved her panel. Plus, she said "Five by Five" SQUEEEEEEEEEE

Other than the adorable Link and Zelda I posted, my other major fave costume from Saturday would have to be this one: 
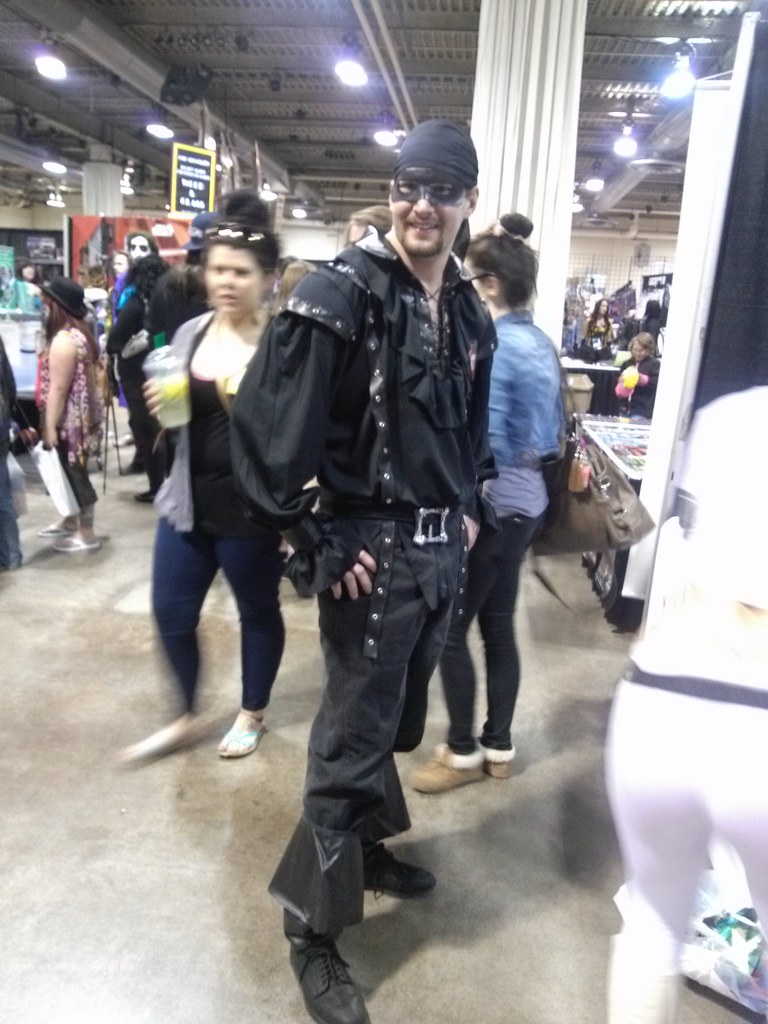
The Dread Pirate Roberts!


I was so excited when I saw this guy that I think I ran across the aisles and smacked him on the shoulder... 
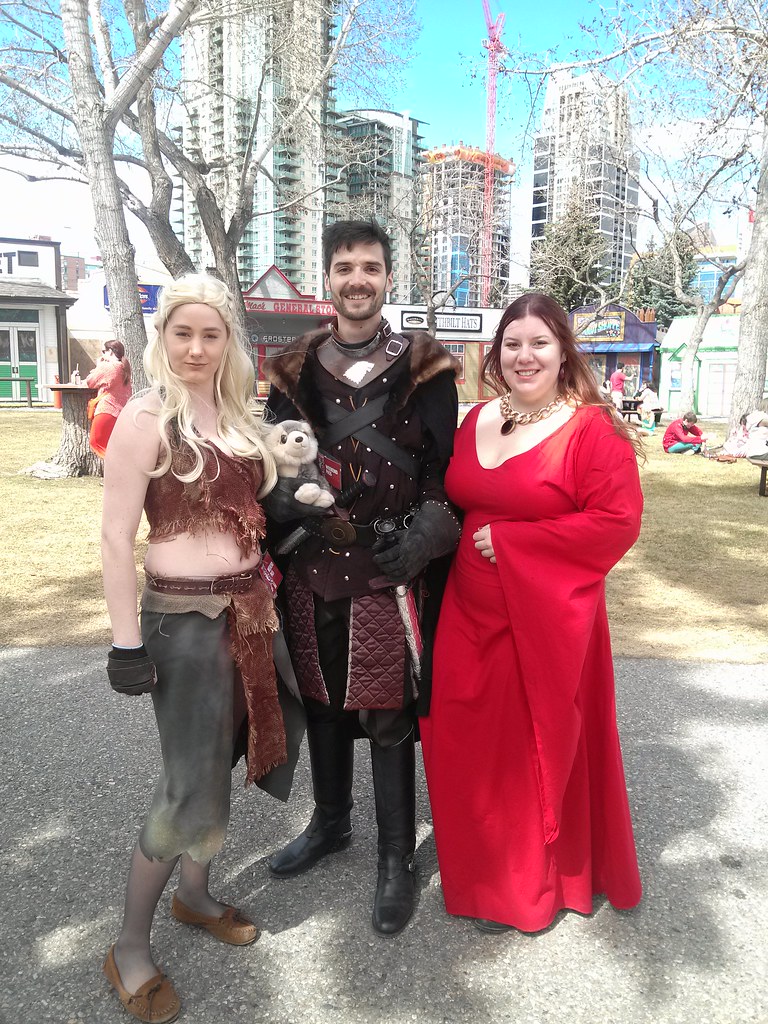


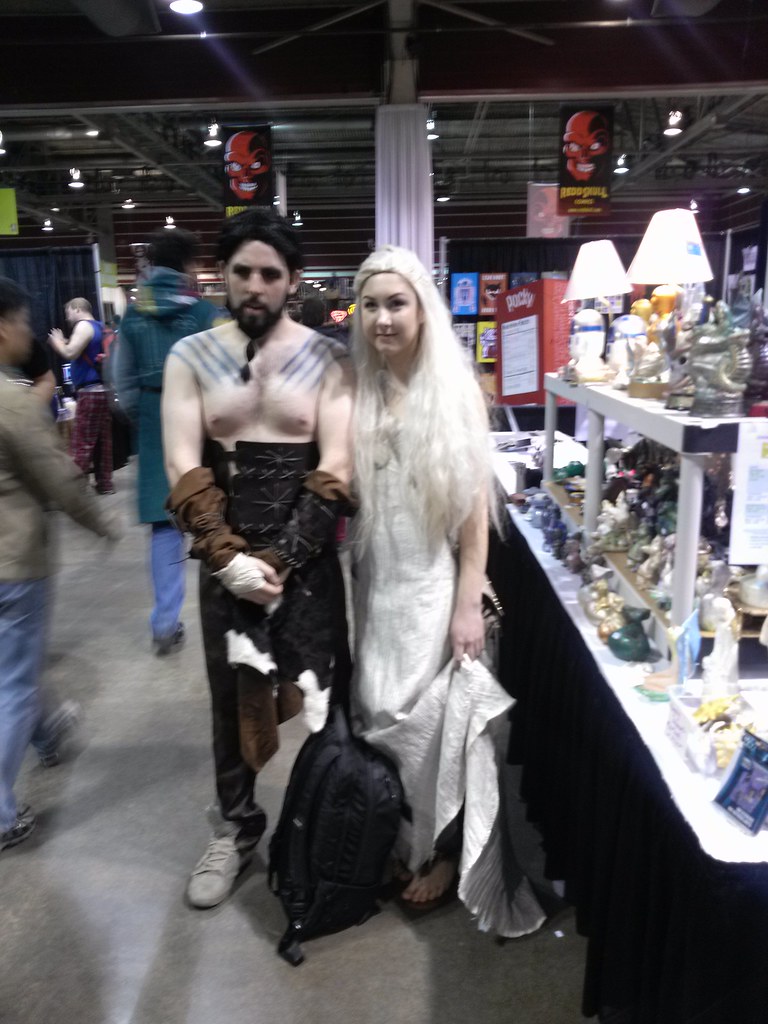
There were also some amazing Game of Thrones cosplays... A spectacular Robb Stark/Dany/Melissandre group and a great Dany/Drogo pair. Loved them!!!


Sunday was all about the panels. Other than the fact that I was REALLY excited to show off MY Melissandre on the con floor. We saw the X-Files Panel, where Gillian Anderson raised $800 for a signed script and a kiss. This was just a delightful panel. The whole group of Robert Patick, Mitch Pileggi and Gillian Anderson were so wonderful and chatty.

This lead into the Game of Thrones panel with Lena Heady and Peter Dinklage. There were awesome! And they were not expecting the crowd of people... There was no seating left by the time they started. It was so intense that they requested beer. The highlight would have to be when a fan asked what was going to happen to Joffrey this season and the crowd split into hissing "SPOILERS!" and laughter. Lena handled this beautifully by just saying "That's my son!"

Finally we watched Nathan Fillion's panel. Who was delightful. Between talking about Edmonton and LA, Castle and the Whedonverse, he was just a phenomenal speaker... He also had a twitter challenge that two people in the audience flat.out.ROCKED. 
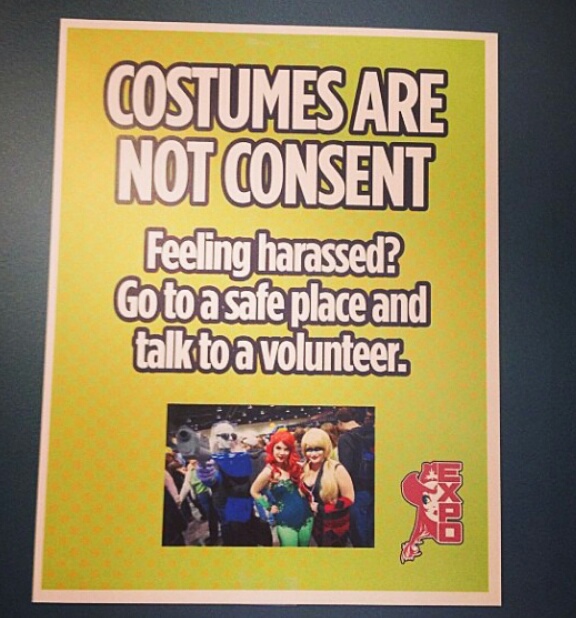

This sign deserves a stand alone PRO!!!
So overall pros: Almost all the panels I wanted to see were in the Coral (This is a major pro). And because of Princess Bride fiasco, I decided not to go to the other smaller rooms so I didn't have to miss the ones I really wanted to see live. (The rest of this week is going to be dedicated to watching everything on the FlipOn feed!). The use a space was delightful  Having a space outside where people could wander was really needed. I had no desire to fight the shopping crowds in the early Saturday since that was the craziest time of the whole day. It was a little cold and windy, but the space was worth it. The Photo Ops were in a different building and because I wasn't getting any autographs I was able to stay away from those areas. (I now find out that one of the booths I was looking for was in fact, in the autograph section!)

Overall Cons: None of the bank machines worked and sadly most of the food stands in the Corral and area were Cash only. Also, there was no where to just buy/get water. You'd have to wait in a line up 20 minutes long with hungry hungry people when all you wanted was a drink! 

However, there were so many many many improvements over the year before that I can't imagine the Calgary Expo not getting better and better each year! Here's to next year!

As always, more photos as I find them over at the Flickr

Saturday, April 13, 2013

Steampunk - Indira


Pure Spec 2011


For Pure Speculation Edmonton (also known as PureSpec) we decided to try our hand at Steampunk. We spent endless hours extending the lengths of our creativity making three individually unique and personally reflective costumes. Since then, we've been able to wear these at several different events and even broadened our Steampunk assortment to include interchangable accessories. I'm going to split them out into three posts as we took lots and lots of pictures of our processes (yet only have one clear shot of each of us?!?!) I'm also going to focus on the original version of our outfits so that I try and stay on track.

Indira AKA Mrs Spiderman @Calgary Expo 2012
This post will probably be updated with better shots as time goes on, but the best place to look is our Flickr account....


What I really wanted to do here was create a cosplay outfit that works with my heritage...  Translation? I wanted to take a Sari and stick a crap ton of gears all over it. We started with coming up with backstories for our characters. Since Steampunk lit is mostly based in Europe and some of the Americas, we decided that Indira was an International Assassin. We made a bunch of weapons hoping that some of them would work with the esthetic.
Flash? What's a flash?

The outfit itself is Sari fabric we picked up at our local shop. We also picked up a complimenting golden orange taffeta fabric to fill out the skirt. Even though it's Sari material, it ended up looking more like a Lengha-styled outfit. Or at least what I think a Lengha would probably look like in the Steamunk timeline. When shopping for Saris, they will usually come with a length of material you can turn into a blouse. This will also have matching border pieces you can use to tie the outfit together. Mine unfortunately didn't have enough border to do all the areas I wanted so I settled on the neckline only.

Over the course of this endeavour, we checked out a lot of con floors selling Steampunk clothes and accessories. Once you check out two or three you will start to see some similar basic stock. You've got to keep an eye our for people that either sell the basic wares, like goggles for $10-$14 that you can then individualize, or people that have already done so but be willing to spend the $$. This is a LOT of detailed work and they do deserve to be compensated for it. We've found quite a few sellers online, but over time many have switched from offering goods direct to the consumer to retailers only (sad panda)... If you find a clearance sale, and you want to build up your steampunk wardrobe, purchase a few right then and there! You will be much happier.

Back on track, while searching through our local thrift stores we came across this really worn our red leather jacket. The colouring was perfect to compliment Indira's outfit. We turned this into a harness and gauntlets. The gauntlets have then the small amount of the excess blouse material added to tie the whole outfit together. One another note, I'd like to point out that gears are really sharp and whenever I forget to wear the gauntlets, I ultimatley get scratched to bits by all the gears all over my outfit.

Here comes the detail work... I purchased some watch parts from a few different Etsy sellers who were selling supplies. I then sorted out all the same size gears and glued one on every.single.flower. I am really proud of this work and if you compliment me while I'm wearing my Indira outfit, that is ALWAYS the first thing to come out of my mouth! This is where the gauntlets protect me the most. From my own skirt. I then hand stitched some chain around the skirt to give it some more dimension. There are two rounds of chain on the skirt itself. Its not something that photographs well, but reads really well in person.

Finally the goggles... I found a pair of ski goggles (what do you expect? It's Calgary). I spray painted the exterior gold. I cut off the band and attached some of the leftover leather from the harness (matchy matchy!)... Then on the goggles piece itself, I used some complimenting lace I cut off from one of my old shirts. I used some Modge Podge and adhered it. The extra "ocular" piece is actually a cut up cap from a creamer container. I then inserted a light inside for some extra dimension. Around the goggles itself I glued some accents: gears, hat pins and the
like. I really loved working on these pieces.Randomly gluing things all over the place was really fun. I wouldn't be surprised if I did this to more things in my home... It's addictive...

I've played around with my makeup each time, but the one things I really like to do is replace the traditional Bindi with a gear. I know that irritates some people but I enjoy it. And at the end of the day, I'm the one wearing it!

I keep searching for more international-inspired Steampunk ideas, so if there are any out there that I've missed I'd love to hear about them!


Thursday, February 16, 2012

The Fifth Element - The set that Started it All!


Fifth Element:

Who: LeeLoo Dallas, Korbin Dallas, Diva Plavalaguna (Guest starring Zorg & two Flight Attendants)
When: LeeLoo and Korbin are post battles and the Diva before she’s dead (spoiler alert?)
Who’s: Luc Besson’s The Fifth Element

This is the costume set that started it all! Over the years we’ve upgrade (and lost) pieces, made others join in at last minute, and have won a couple of Halloween costume contests with this group. We’ve all watched the movie hundreds of times over, and quote it incessantly in and out of costume. It’s important to note that these costumes are iconic. Jean-Paul Gaultier produced and designed over 950 costumes for this film. Each piece is inspiring and memorable, and we do our best to replicate within our means.

Fun Facts, we have a rotating cast of flight attendants, and we’re still on the hunt for our elusive Ruby Rod, and perhaps one day we’ll let the more shy cast member finally dress up as the Priest or David. But our theory is what’s the point of replicating Gaultier if you can’t be the craziest?

LeeLoo Dallas
LeeLoo Dallas, played by Mrs Spiderman (me), was a pretty straightforward costume. Until you started debating on whether to wear the Orange Suspenders outfit versus the Band-Aids outfit. When it was realized that death would be imminent by putting me in the Band-Aids costume, the team focused on making the Orange Suspenders. In the film, the actual suspenders look to be made of some pliable plastic or rubber compound. For comfort’s sake, ours are made out of polar fleece. Bright orange polar fleece cut into shape with holes inside to mimic the look. The pants were old dance pants that were spray painted silver. The piping was originally sewed on, but then it was glued on to reinforce. The top was an old ribbed tshirt that was stitched up to be the fitted midriff. Here’s where the outfit gets more interesting... The wig. In order to get a ‘battled’ look, the wig was tousled and at the top there are individual dreads created. The best thing about this wig is that the more it travels, the better it turns out. There’s no accessories other than the multipass, and some times, if they are available, orange eyelashes are worn with the whole set. Makeup is kept to a minimal, but sometimes black eyeliner is used around the eyes, and smudged around the face to appear as grease and dirt. Funny fact, the better picture of the wig is below, because above, I completely lost the wig days before leaving for Norwescon 34, so the above wig was a last minute pick up!

LEELOO DALLAS MULTIPASS (she knows it’s a multipass)
So there’s the original (also last see in the image!), and there are the ones that have followed it. I have lost about 4 multipasses to date. I've also forgotten to pack it when traveling, and forgotten to bring it along when going out. The first and ultimate multipass was a Ducktape coin purse with a zoomed in shot of Leeloos full multipass information. This was awesome because it carried around costume id and real id (and money!). However, it is lost in the abyss and resulted in a zoomed in shot of the multipass in an empty cd jewel case. The benefit of this one is it shows up better on pictures, but it’s not as cool as the original.I actually found one of the old Multipasses in a drawer while I was organizing my house a few weeks back... I'm not sure how it got there in the first place..

The Diva
This is the Keynote piece of this costume trio. I believe that every one of our costume sets has one piece or person that needs to be more recognizable than the rest, and the costuming stands out above the others, thus Keynote. The Diva is just that... When Dejathoris dons her full regalia, people immediately get it right. I’ve tasked her with writing the total “how she did it”:

This one was a challenge – how were we going to recreate a 7 foot tall blue tentacled alien opera star?!?!?   The basis of this costume was a skirted version of a hooded Zentai body suit (covering everything but the face), which we ordered off of eBay.  Because this fetish-wear came with the attached leggings, we were able to remove this excess fabric for use in creating the headpiece and tentacles so that there would be an exact match      and the overall look would be uniform.  The skirt was lengthened using black spandex fabric in a circle-cut to create the “mermaid” style hem.  The two fabric colors of black and blue were then blended using black spray-paint.  This also added a bit of length to hide the 6” platform heals that normally 5’5” Dejathoris wore to try and create some of the Diva’s height.   This illusion was aided by making the headpiece about 2 feet tall, which was accomplished by stretching a tapered tube of the spandex fabric over a standard bike helmet, then filled out with pillow stuffing.   To make the super-long fingers, the tips on the built-in gloves were stretched and pulled, then false nails were glued onto the ends. The crown, back-piece, gauntlets, collar and belt were all cut from vinyl and attached with Velcro.   There was no pattern for these, just a cut and fit approach that took a lot of trying on, taking off, adjusting and trying on again.

For the face-paint we used an old body-makeup trick that might not be the best recommendation for every-day wear, but has proven very successful and cost-effective for us many times in the past:  Colored hairspray (the kind you find at the dollar stores around Halloween).   An even spray of blue, sealed with Graftobian Makeup Setting Spray™  created a uniform skin tone that matched the spandex.  Black eyeliner finished the look by highlighting brows, lips and the eyelids.   

Unfortunately, Dejathoris can’t carry a tune in the bucket – so a full on Diva performance in this costume is out of the question – but it is surprisingly comfortable and she has been know to break into the “Diva Dance” on more than one occasion!

Korbin Dallas
The funniest thing about this costume is that when Guavious is standing by himself people have thought or asked if he was NUMEROUS Bruce Willis characters... Think about it, how many times has Bruce Willis been in a ripped tux with blood all over it... Let alone the fact that we coat Guavious with blue blood as well to create some continuity with LeeLoo. Something we noticed was an important part of the look was the hair. We either dye Guavious’ hair blond(er), or let him hang out in the sun for long periods of time to bleach it. We also make sure to keep it pretty short. When it’s longer, you lose the aesthetic and the look actually falls apart a little (attention to detail and all that!). This is another simple costume as over the years we’ve misplaced dozens of white tux shirts and had to run to Value Village to get a new one to destroy. The set is simple though, white ripped tux shirt, black pants, black suspenders, red blood paint, and blue dye.  Take your time layering the red and blue wounds.

Zorg
Jean-Baptiste Emmanuel Zorg is an iconic villain with an incredible sense of style! Since Zorg’s most distinguishing feature is his unique hair piece, we knew that had to be our starting point.  We began with a Marilyn Manson wig, which had the right blackness in terms of hair color and the half-shaved look we needed.  A little styling and the shaggy side of the wig was turned into a slick bob.   The ‘bald’ side of the wig was transformed from white to beige using Revlon Color Stay foundation, and then covered in Saran wrap to get the look of Zorg’s plastic headpiece.    When sewing the shiny metallic shirt, craft foam was used to reinforce an oversized collar that would stand up around the ears.  Simple suiting fabric with a bold pinstripe formed the basis of his knee length over-vest.   Final touches included adding black slacks, and one fantastic Nerf blaster as a stand-in for the infamous ZF-1.

Zorg was used during a Halloween costume ball and once again the following year in Las Vegas. My favorite picture of Zorg also happens to have me photo bombing him. I think I was trying to be stealthy Leeloo at the time...At the end of the evening on our Vegas Halloween excursion, our Zorg removed his headpiece and vest, turned down the oversized collar on his shiny shirt and then added heavy gold rimmed sunglasses…. And volia!  Instant Elvis costume!!!


Flight Attendants
Over the years we have had a couple of different flight attendants join our group – lucky, this is a fairly easy costume to throw together as it’s the accessories and makeup that really rock this look:  
Step 1:  Find a tight, short, blue dress.  
Step 2:  Cut strategic key holes around cleavage and back into dress fabric. 
Step 3:  Cut hat, collar and boot covers out of blue craft foam, assemble and add “wings” cut from white craft foam using glue gun. 
Step 4:  Add a blonde bob wig and BLUE, BLUE, BLUE eyeshadow.  
Step 5:  Get dressed and board the shuttle for Folston Paradise!

 You can check out more of our pictures on our Flickr page here. We'll try to keep it up to date as possible!

Wednesday, February 8, 2012

What are we currently working on - Spring 2012

So I'm going to make every effort to document all the costuming making process as best I can... But I might forget for a while... And I was thinking about it, sometimes I'm going to want to talk about what we're working on right now rather than what we just finished... I will eventually get to my point...

So on one of my favorite author's sites/blogs they post what they are working on and where their current projects statuses... I thought I would try something similar....

What we're working on:
In progress: Perseus - Clash of the Titans (2010)
Staging: 1) Andromeda & Medusa - Clash of the Titans (2010)
               2)Katniss Everdeen; Effie Trinket - The Hunger Games

So let's say that "In Progress" is going to be the costume we're trying to get done RIGHT NOW, Staging could be anything from buying materials, shopping, making a mess in Dejathoris' house with all our crap stuff.

We, and by we I mean Dejathoris, found some amazing material called Wunderflex... I'm not sure if I'm spelling that right, I'll change it later if I'm told to. It is a heat malleable material that apparently pro and regular costumers use all the time to create everything... So we bought it to create the metal work on Perseus' armor. HOLY FRACKINSTOCK this stuff is super wicked. I'm going to try and see if Dejathoris wants to do her write up on it so I won't over share, but this stuff is good for beginners and GDDMN if it doesn't look pro when you're done! The pictures around here are of us trying to mount the Wunderflex "metal" pieces (post painting and staining) onto the leather backing. These are just pictures of the shin guards that Perseus wears. This is going to be the BEST.ARMOUR.EVER.


So while Dejathoris was workin on that, I was busy working on the "skirt" (I'm trying to find a more masculine name for it, thoughts?)... Now what really, really, really sucks? Finishing all the edges... I cut and measured 18 pieces staggering the lengths and widths in proportion to the images. As much as you think you might want a "rough" finished edge, you actually want to do as much finishing as possible... Dejathoris actually went to our Leathercraft class where they taught finished techniques and picked up a bevel. This little doodad smooths the edges of the leather and actually makes the end product look better... So learnings? Finish your damn edges...  We also decided to create a little bit of a border on each of the pieces. So we took an edging tool and ran it along about a quarter inch or so from the end. Once the pieces are stained we're going to make them "pop" by running over the border with a black sharpie. Another learning was that this leather is only 3.5 weight whereas our leather for the Steampunk Trio (of Evil) was a 4.5. The reason this is of note is because the 3.5 took to a sewing machine leather needle amazingly, while the 4.5 broke about 50 million of them. (No lie, I counted).


And finally, Staging wise, we picked up some really great stuff over the weekend. Sephora has a sale on the Eyelashes that Effie Trinket is wearing the in promotion pictures. They're the laser cutout eyelashes, the pattern is called "Deer and Butterfly". We also picked up a nice big Blond 'Fro wig from the dollar store. While we were at Bhatia Cloth House, we picked up some jewelery for Andromeda because my recent attempts at jewelery were running out of time, and costing way more than they should. (More on that later)... FINALLY, we stopped by a thrift store on our way home and found the perfect Katniss jacket. We're going for the "regular" Katniss look rather than the "Arena" look. That way we can take a few literary liberties.


Alright, I think I emptied my brain of all postable material... Guavious is back in town this weekend, and we're hoping to get some pictures of him trying out what we've finished of Perseus, so maybe we'll have something new sooner than we think! And like I said, I'm going to try and write summaries of all the different costume sets we have so far!


Cheers!

Deer and Butterfly Eyelashes @ Sephora:
http://www.sephora.com/browse/product.jhtml?id=P294802&categoryId=B70

Wonder Woman - Halloween 2011

Wonder Woman
Who: Wonder Woman (Mrs. Spiderman)
What: DC Comics Superhero (1941 – Present)

Alright people, we have two weeks to dress Mrs Spiderman as Wonder Woman for Halloween 2011... All because on the hunt for another costume piece we found Wonder Woman boots at a thrift store for $10... Yes, this is one of the only instances where we may reference price because they were $10 freaking dollars... WOOT WOOT! Although as you can see the costume turned out awesome, it took a lot of walking away... And that’s a very important piece of costuming advice... Sometimes you have to just walk away... If you’re frustrated, that’s going to show in your work, and then you’re stuck with something that looks like you were messy and unorganized. Even if that is the look you’re going for, you’re going to be stuck with something you’re not satisfied with...

So after we found the boots we headed straight to Fabricland and found everything but blue satin with gold stars (we found red satin with gold stars, purple cotton with yellow stars, seriously people!). However, Dejathoris was up in Red Deer meeting up with a friend and had some time to kill... Lo and behold, first stop Fabricland and bam! Blue satin with Gold Stars! On top of that, she found some gold rope for the “Lasso of Truth”. We then spent a few days searching the internet and clearance outlets for something that could pass as the red corset top. Much to our avail, red is apparently not available at a sale price in early Fall... However, at the Little Shop of Pleasures Dejathoris found a clearance Betty Boop costume which was made up of a red sparkly dress (using that term loosely) and a black wig that we had other plans for.

So you would think a simple tube dress would be fairly easy to finagle into a top, right? Nope. The dress was found at an exotic shop, right? So you would also assume that it was meant to fit an adult, but it would in fact not. We then quickly added a long zipper down the side to try and “make it work”... However, the dress itself when worn for over twenty minutes started to irritate and create red marks all over... Still trying to “make it work” we moved on to the logo. While trying to adhere strips gold vinyl to the dress, the stretchiness of the tube created a blob affect, rather than the superior logo in the final result. What happened here? We walked away...

Top number two started out as a faux corset with brown lace material over top of it... The plan was to take off the lace, adhere the logo, and add lacing to the back because the top was still too darn small! However, the top was also stretchy, so the same problem as the sparkle Betty Boop top! Will we ever win??? At this point, the countdown is less than 4 days away....

During this break we did however finish the Tiara & Bracelets. Whilst at Fabricland we picked up some “letterman” style numbers that happened to have a red star in them. That red star was ironed on to a tiara shaped piece of gold vinyl & elastic similar to a headband. The idea was to pull all of Mrs Spiderman’s hair above the elastic to hide it and help facilitate the high volume hair that Lynda Carter made so iconic. A helpful tip here is to make sure that the elastic, or anything around your head is never too tight... There’s the temptation to make things tight in your costumes so that you have the assurance that they won’t fall apart, but when things are around your face or head, if they are too tight, they’re just going to give you headaches. Once on, we used some bobby pins to pull the tiara elastic up a little higher so that it was not pressing on the ears or temples.

The Bracelets were the easiest to throw together. Some tapered squares of Gold Vinyl were cut and seamed while some Velcro stickers were put on the corners to hold everything together! Easy peasy!
One of the pieces we’re most proud of is the Logo. Since we’d decided to do more of a 40’s style Wonder Woman (with a skirt rather than hot pants/swimsuit style) we had our pick of logos. The Eagle is iconic and the stylized “W” is as well... But if you go back, you can find a stylized “W” that has a shape of an Eagle on the top. Perfect! We printed this off on regular paper, taped it onto the gold Vinyl, and then cut it out as if it were a fabric pattern. This was then glued on to some adhesive backed felt. So the front is the felt and the back has an adhesive to stick onto the top fabric!

Saturday morning, the party starts at 9... Everyone’s showing up at 7.... We still have no finished Wonder Woman. We realize that there is enough material from the cape to make a top from scratch, and so that’s where we go. Grabbing an old corset-style top pattern from Dejathoris’ pattern archives, we quickly cut out the material and head to the sewing machine. Earlier purchased was some black grommet tape to facilitate the lacing to ensure that the top stayed on. Although, once the Logo was put on, the top started to slide down. It had to be safety pinned onto bra straps to hold itself up! On another day, we’ll sew some loops onto it to string the bra straps through. Maybe when we’re not so crunched for time!

The skirt was purposefully cut way to long so that we could see where exactly it would fit with the top and the boots. It’s good to gauge “middle pieces” or essentially the piece where you have the most leeway. For instance, the boots were purchased first, the top was the most hassle to get right, so the skirt was the most adaptable piece of the ensemble. In order to get the correct look, all other pieces needed to be done in order to be sure about the length of the skirt, the flare of the skirt, and the look all together. Once pinned at the right length and sewn, all that was left was the cape.

A lot of the imagery, and the prepackaged costumes for some reason have Wonder Woman in a short waist high cape. However, if you look at Lynda Carter’s photographs, there are many with the long flowing two sided cape. Mind you, we did not have the time to make a two sided eagle influenced cape, BUT we did go with a long red satin to make ours. Gauged with the boots on we measured the material. Once hemmed, we added an adjustable tie like a drawstring so that we could create the rushed look at the shoulders. The best thing about this cape, which couldn’t be caught on camera (yet) is how it flows when you walk!

Hair and Makeup were pretty straight forward... As we’ve alluded to, we wanted big wavy hair, which involved steam curlers and a lot of back combing. The essence you want here is a lot of “pouf” at the top of the head, and a lot of wave around the face. Hairspray is a must and you must be very, very liberal! Makeup was mostly gold toned eye shadows with a very thick layer of black eyeliner. Black and gold eyelashes were added to complete the look! A true red lipstick was also used to connect the whole look. The red, MAC Pro Longwear Lipcolour in Lasting Lust which actually matched the satin complimented the whole outfit. And finally, for fun of course, gold body glitter (NIX) was applied liberally.

So all in all, not bad for an afternoon of rushed costuming spawned by the Greatest Deal of All Time ™. We will definitely be taking this costume to future venues and perhaps we may even get it judged!